


Written by the AJLuxe Team. Last updated: May 2026.
Ear cuffs grip the cartilage with tension — no piercing required. The helix (outer rim) is the most common placement, but five placements work. Squeeze the cuff to match your cartilage thickness for a secure fit. Wearing one cuff is a focal point; wearing two is a symmetrical statement. Hair up shows the cuff best; a lobe cuff works beautifully with hair down.
Learning how to wear ear cuffs correctly changes the whole experience. A well-fitted cuff stays put all day, looks intentional, and adds serious edge to any outfit — no piercing appointment needed. Ear cuffs grip the outer rim of the ear using tension or a clip, making them one of the most accessible jewelry styles you can own. If you've ever had one slide off or feel uncomfortable, you were probably wearing the wrong size or style for your ear shape. This guide fixes that. We also cover the five ear placements, one-side vs. both-sides styling, and what to wear them with — everything competitors skip. For a broader look at earring styles, see our complete earring guide.
Our earrings at AJLuxe use sterling silver posts throughout — hypoallergenic and comfortable for all-day wear, even for sensitive ears.
5 Types of Ear Cuffs Explained
Not all ear cuffs work the same way. The type you choose affects how secure it feels, where it sits on your ear, and whether it reads as bold or minimal. Here are the five main types.
| Type | How It Stays On | Best Ear Placement | Bold or Subtle | Piercing Required? |
|---|---|---|---|---|
| Tension / squeeze cuff | Spring pressure grips cartilage | Helix, anti-helix | Subtle to moderate | No |
| Spring-loaded cuff | Internal spring + hinge | Helix, lobe | Moderate to bold | No |
| Wrap-around / coil cuff | Wire coils around cartilage | Helix, conch | Bold | No |
| Clip-on ear cuff | Hinged clip with padded back | Lobe, tragus | Subtle to moderate | No |
| Crawling ear cuff | Long arm follows the helix curve | Full helix from lobe upward | Very bold | Sometimes (lobe anchor) |
Tension / squeeze cuffs are the most common type. A C-shaped band of metal presses against both sides of the cartilage. You squeeze it slightly open to put it on, then release so it grips. The holding force comes entirely from the metal's spring tension, so the thickness of your cartilage determines the right gap width. Most helix cartilage is 1–2mm thick — if yours is thicker, you'll need a wider-gauge cuff.
Spring-loaded cuffs have a hidden hinge mechanism inside the band. They open like a tiny pair of jaws and snap shut around the ear. The internal spring provides consistent clamping force regardless of how you put them on, making them more forgiving for beginners. They're also the style least likely to loosen and fall off during movement.
Wrap-around or coil cuffs use a spiral of metal wire that winds around the cartilage one or more times. You thread the ear through the coil rather than squeezing the cuff onto it. The extra contact area distributes the grip pressure, which makes them comfortable for longer wear. They do require a bit more patience to put on correctly.
Clip-on ear cuffs work like traditional clip earrings but are designed to sit at the upper lobe, tragus, or even the lower helix. A padded back plate protects the skin. These are the best choice for people with very sensitive cartilage or for anyone who wants a secure lobe cuff without any squeezing. If you experience sensitivity with metal jewelry, see our guide to earrings for sensitive ears.
Crawling ear cuffs are the most architectural type. A long curved arm follows the natural curve of the helix from the lower cartilage upward. Many styles anchor at a lobe piercing for extra stability, though some are tension-only. They're the statement piece of the ear cuff world — dramatic, structural, and absolutely on-trend in 2026.

How to Put On an Ear Cuff (Step by Step)
This guide covers tension cuffs — the most popular type. Once you've got this down, every other style feels intuitive.
- Identify the right part of your ear. The helix is the outer rim of cartilage that runs from the top of your ear down toward your lobe. It's the firm ridge you can pinch between your fingers. That's where most tension cuffs are designed to sit.
- Squeeze the cuff to match your cartilage thickness. Hold the cuff between your thumb and index finger. Very gently press the two arms apart — just wide enough to slip over your helix. Don't open it more than necessary, or the metal will lose its spring tension over time.
- Slide the cuff onto the helix. Position the cuff at the spot on your helix where you want it to sit. Angle it so both arms bracket the cartilage rim, one arm on the front face of your ear and one on the back.
- Squeeze gently to secure. Press the two arms together lightly with your thumb and index finger until the cuff grips the cartilage. You should feel firm resistance — snug, not painful. If it pinches, open it a fraction more. If it slides freely, close it a fraction tighter.
- Test the hold by shaking your head side to side. Give your head two or three quick shakes. A properly fitted cuff won't move. If it slides, remove it and squeeze it 0.5mm tighter, then retest.
How to Prevent Ear Cuffs from Falling Off
Ear cuffs fall off for three reasons: wrong size, wrong type, or worn in conditions they can't handle. Here's how to fix each one.
Size it tighter. Most people are too gentle when squeezing a tension cuff. The metal needs to grip the cartilage with actual friction. Squeeze it until it holds without feeling painful — that's the sweet spot. If your cuff is not adjustable, size down to the next smaller diameter.
Match the cuff to your cartilage thickness. Thin cartilage (under 1.5mm) needs a cuff with a smaller inner gap. Thick cartilage (over 2.5mm) needs a wider opening — standard cuffs will feel loose. When you buy online, check whether the product description mentions a gap range or gauge recommendation.
Apply a thin layer of clear nail polish to the inner surface. This adds a grippy, slightly tacky layer that holds against smooth cartilage. Let it dry fully before putting the cuff on. Reapply every few weeks as it wears off.
Switch to a spring-loaded or clip-on style. If tension cuffs keep slipping on your ear shape, the hinge mechanism in spring-loaded cuffs provides a more consistent hold. Clip-on styles with a padded back are the most secure option for lobe placement.
5 Ear Placements for Ear Cuffs
Where you place a cuff changes the entire look. These are the five placements that work best — and the cuff types that suit each one.
Helix (outer rim cartilage) — Most common. The helix is the curved outer rim of the ear, running from the top down to where the lobe begins. It's the firmest, most accessible part of the cartilage. Tension cuffs, coil cuffs, and crawling cuffs all sit here naturally. This placement is visible at any angle and works with most hairstyles.
Conch (inner bowl of the ear). The conch is the wide, curved inner surface of the ear — the part that looks like the inside of a seashell. Conch cuffs sit deeper in the ear and look especially striking when the hair is pulled back. Wrap-around and coil cuffs work best here because they can reach around the curved wall of cartilage. This placement is more advanced and slightly harder to fit yourself.
Tragus (small flap near the face). The tragus is the small, pointed flap of cartilage that sits directly in front of the ear canal. It's firm but small, so only petite clip-on cuffs or very slim tension cuffs designed for this placement will fit without discomfort. A tiny tragus cuff adds subtle detail that's especially visible in profile.
Anti-helix (curved inner ridge). The anti-helix is the curved ridge that runs parallel to the helix, forming the inner raised edge of the upper ear. It's less commonly used than the helix, but a slim tension cuff sitting here creates an unexpected, architectural look. This placement sits deeper in the ear than the helix and is most visible from a straight-on angle.
Lobe cuff (over the earlobe — no piercing needed at all). A lobe cuff wraps around the soft lower portion of the ear. Because the lobe has no cartilage, clip-on styles with a padded back are the most secure option. Spring-loaded lobe cuffs also work well. This is the most comfortable placement for all-day wear, and it's the only placement where hair down still shows the jewelry clearly.

One Side or Both? How to Style Ear Cuffs
Wearing one ear cuff or two is a real style decision — not just a personal preference. Here are three specific approaches that each work.
| Approach | When to Use | Pairing Tip |
|---|---|---|
| Single cuff as focal point | Editorial or statement looks; when you want one bold detail | Leave the opposite ear bare or wear a single small stud |
| Matching pair for symmetry | Formal events, clean minimal outfits, everyday wear | Keep both cuffs identical — same metal, same placement |
| Cuff on one side + lobe stack on the other | Curated ear trend; works for casual and creative dressing | Match metal tones across both ears; keep lobe stack to 2–3 pieces |
Wearing a single cuff on one ear is the most editorial approach. It draws the eye intentionally and reads as deliberate rather than incomplete. Pair it with bare skin, a clean neckline, and hair pulled back on that side to give the cuff maximum visibility.
A matching pair feels polished and balanced. This is the safest approach for formal occasions or when you're building a minimal look. Choose cuffs that are identical or near-identical in shape and finish — mixing styles in a matching pair tends to look accidental rather than styled.
The asymmetric approach — cuff on one ear, earring stack on the other — is the most popular styling move in 2026. Wear your cuff at the helix on the left, then stack two or three lobe earrings on the right. Keep the metal tone consistent across both sides. This look photographs especially well and works from brunch to a night out.
What to Wear Ear Cuffs With
Ear cuffs work at every dress level. The key is matching the weight of the cuff to the outfit and adjusting your hairstyle to show the jewelry off.
Hairstyles
Hair up is the best pairing for helix cuffs — an updo or high ponytail exposes the entire outer ear. Half-up styles also work well. Hair down covers a helix cuff, which defeats the purpose. The exception is a lobe cuff, which sits low enough to stay visible even with hair down.
Outfit Pairing Guide
| Outfit Style | Best Ear Cuff Type | Hairstyle Pairing | Style Note |
|---|---|---|---|
| Casual / streetwear | Tension or coil cuff, any finish | Messy bun or half-up | Stack with lobe studs for a curated ear |
| Workwear / business casual | Slim tension cuff in gold or silver | Low bun or sleek updo | Keep it to one ear; skip bold statement pieces |
| Evening / cocktail | Crawling cuff or embellished coil | Updo or sleek high pony | Go lighter on necklaces — let the ear do the work |
| Festival / creative | Multiple cuffs, mixed styles | Any — both exposed ears ideal | Mix metals intentionally; layer freely |
Neckline note: Ear cuffs compete directly with statement necklaces. When you wear a bold crawling cuff, skip the necklace or wear a fine chain only. A slim helix cuff pairs beautifully with a longer pendant because the two pieces occupy different visual zones.
How to Keep Ear Cuffs from Falling Off
Tension alone holds the cuff — understanding that tension is everything. Here are five rules that eliminate almost every slip issue.
1. Size it right. Most adjustable tension cuffs can be gently squeezed to close the gap. Start with the cuff at default width, put it on, and test. If it slides, squeeze it 0.25–0.5mm tighter. Repeat until it holds on a head shake. Don't over-squeeze — that causes discomfort and can crack thinner metal bands.
2. Buy for your cartilage thickness. Standard helix cartilage is 1–2mm thick, but variation is significant. Thin cartilage needs a cuff with a smaller inner gap. Thick cartilage (common in men's ears and some ethnicities) needs a gap of 2.5–3mm. If you consistently lose cuffs, this is almost always why.
3. Spring-loaded and clip-on styles are the most secure. If tension cuffs consistently slip, switch styles. Spring-loaded cuffs use a mechanical hinge that snaps shut rather than relying on metal flex. Clip-on cuffs with a padded back apply even pressure across a wider surface area.
4. Check the grip every hour at first. Metal warms and slightly expands with body heat. Check the grip 30 minutes after putting the cuff on, then again at the one-hour mark. After one or two wearings, most people find the cuff stays consistent without adjustments.
5. Avoid wearing ear cuffs during exercise or sleep. Sweat loosens metal grip. According to guidance from the American Academy of Dermatology, removing jewelry before sleep and physical activity protects against skin irritation and metal fatigue. Remove cuffs before workouts, swimming, and sleep.
Related reading: Ear stacking guide.
Frequently Asked Questions
How do you wear ear cuffs correctly?
Squeeze the cuff slightly open, slide it onto the helix (outer rim) of your ear, then press the arms together until the cuff grips the cartilage firmly without pinching. Test by shaking your head — a properly fitted cuff won't move. Most helix cartilage is 1–2mm thick, so start with a standard tension cuff and adjust from there.
Do you wear ear cuffs on both sides?
Both approaches are valid. A single cuff on one ear creates a focal point. Matching cuffs on both ears look symmetrical and polished. The most popular current approach is a cuff on one side paired with a small earring stack on the other — an asymmetric look that feels curated and modern.
How do ear cuffs stay on without a piercing?
Tension cuffs grip the cartilage with spring pressure from a C-shaped metal band. The friction between the metal and the cartilage is what holds the cuff in place. Squeezing the cuff to match your cartilage thickness is the most important factor. Spring-loaded and clip-on styles add a hinge mechanism for extra security.
Are ear cuffs in style in 2026?
Yes — ear cuffs are one of the strongest jewelry trends of the year. Crawling cuffs that travel up the helix and bold conch cuffs are especially prominent. The no-piercing format keeps the trend accessible, which is part of why it's held momentum for several years running.
Can ear cuffs damage your ear?
A properly sized ear cuff doesn't damage ears. A cuff that's too tight can restrict blood flow and cause temporary soreness or redness. Remove any cuff that pinches hard, leaves a visible indent, or causes lasting discomfort. If you have metal sensitivity, stick to sterling silver, 14k gold, or titanium.
What size ear cuff should I get?
Start with an adjustable tension cuff — most standard styles fit cartilage between 1mm and 3mm thick. If you have thin cartilage, look for a small inner-diameter option. If you have thick cartilage, look for a wider opening around 2.5–3mm. Size up if you're between sizes — you can always squeeze a cuff tighter, but you can't stretch it wider without distorting the shape.
Can you sleep with ear cuffs on?
Remove ear cuffs before sleep. Pillow pressure can bend or distort the metal, and a deformed cuff won't grip correctly the next day. There's also a real risk of the cuff snagging in hair or bedding and falling off during the night.
How do you style ear cuffs with other earrings?
Pair a helix cuff with small lobe studs on the same ear for a layered, intentional look. On the opposite ear, a stack of two to three lobe earrings creates asymmetric balance. Keep metal tones consistent across both ears. Avoid large drop earrings on the same ear as a wrap-around or crawling cuff — the two pieces will visually compete.
Planning to add hoops alongside your ear cuffs? Read our complete hoop earring size guide — covers every size from huggies to oversized statement rings, with face shape and piercing-type recommendations.
Ear cuffs are one of the most powerful tools for building a curated ear without new piercings. See how they fit into the full picture in our guide to building a curated ear.
For the complete earring reference — types, sizing, curated ear, face shape guide, and sensitive skin — read The Complete Earring Guide.
Sensitive-ear shopping path
No-piercing styling can still irritate sensitive skin
Ear cuffs avoid the piercing channel, but the metal still touches skin. Choose smooth edges and sensitive-skin friendly materials.
- Hypoallergenic jewelry guide — metal safety for skin contact
- Shop hypoallergenic jewelry — pieces designed for sensitive skin
- Types of earrings — compare cuffs, huggies, studs, hoops, and drops
Shop at AJLuxe: Ear Cuff Earrings — no piercing needed, 925 sterling silver ($27.99) · Cross Ear Cuff Earrings — no piercing, 925 sterling silver ($36.99)
Final Thoughts
Ear cuffs look high-effort but take thirty seconds to put on. The difference between a cuff that falls off and one that holds all day is almost always fit — matching the cuff's gap to your cartilage thickness solves most problems immediately. Start with a slim tension cuff at the helix, get the grip right, and build from there. Once you're confident in the basics, experiment with conch placement, crawling styles, and asymmetric combinations.
Ready to find your cuff? Browse the full AJLuxe earrings collection for tension cuffs, coil cuffs, and crawling styles in gold and silver. And if you want to go deeper on earring styles beyond cuffs, our complete guide to earring types covers everything from hoops to huggies to threaders.
Explore the Ear Cuff Guide
Looking for more? See our complete collection of ear cuff resources:
- What Is an Ear Cuff? Complete Guide
- Ear Cuffs for Non-Pierced Ears
- Types of Ear Cuffs: Every Style
- Ear Cuff vs Cartilage Earring
All third-party trademarks, brand names and product names are the property of their respective owners. AJLuxe is not affiliated with, endorsed by, sponsored by, or otherwise connected to any third-party brand referenced in this article. Brand names are used solely for accurate comparative reference, and material descriptions reflect each brand's own published product specifications at the time of writing.
You Might Also Like
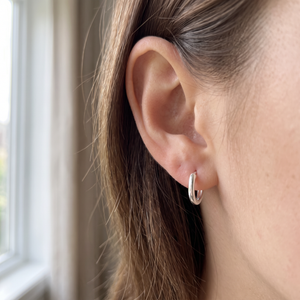
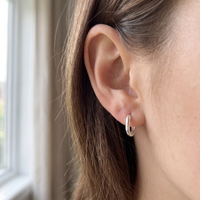
The piece they're describing → Silver Huggie Earrings for Women — 925 Sterling Silver, Hypoallergenic, Minimalist
Personalize Yours


