


Quick Summary
- The safest method for cleaning sterling silver jewelry is warm water and a drop of dish soap — it works for most tarnish without any risk of damage.
- For stubborn tarnish, a baking soda paste applied with a soft cloth or toothbrush removes oxidation effectively.
- Never use bleach, chlorine, toothpaste with whitening agents, or ultrasonic cleaners on pieces with gemstones — these cause irreversible damage.
- Always dry sterling silver completely before storing it, and keep it in an airtight bag or anti-tarnish pouch to slow future tarnish.
- Commercial silver polish is fine for heavily tarnished pieces but should be used sparingly — over-polishing removes the thin layer of silver over time.
If you own sterling silver jewelry, you already know how quickly it can go from bright and shiny to dull and dark. Learning how to clean sterling silver jewelry the right way — without accidentally scratching, dulling, or damaging it — is one of those skills that pays for itself in saved pieces. The good news? Most of what you need is already in your kitchen. This guide walks you through the safest, most effective methods, what to avoid, and how to keep your silver looking its best long after you clean it.
Why Sterling Silver Tarnishes (And Why It's Normal)
Pure silver is too soft to wear as everyday jewelry, so sterling silver is made from 92.5% silver mixed with 7.5% other metals — usually copper. That small percentage of copper is the main culprit behind tarnish. When the copper in the alloy reacts with hydrogen sulfide in the air (from pollution, rubber, wool, and even some foods), it forms silver sulfide on the surface. That's the gray-to-black discoloration you see.
Tarnish is a surface reaction, not a sign that your jewelry is low quality. Even solid sterling silver from high-end brands tarnishes with wear. Humidity, sweat, perfume, lotion, and chlorine all accelerate the process. The silver itself is fine underneath — you're just cleaning off a chemical layer on top.
The 925 stamp on your jewelry tells you it's genuine sterling silver. Pieces stamped 925, SS, or STG are all sterling and can be cleaned using the methods below. If your piece is silver-plated rather than sterling, use only the gentlest method (dish soap and water) because harsher techniques can strip the plating.
Method 1: Dish Soap and Warm Water (The Safest Starting Point)
This is the method you should try first, every time. It removes everyday grime, skin oils, and light tarnish without any abrasion or chemical risk. It's safe for all sterling silver pieces, including those with gemstones, pearls, or enamel details.
What You Need
- A small bowl
- Warm (not hot) water
- One or two drops of mild dish soap (Dawn or similar — avoid lemon-scented or antibacterial formulas with harsh additives)
- A soft-bristle toothbrush or a soft lint-free cloth
- A clean dry towel
Steps
- Mix your solution. Add one to two drops of dish soap to a bowl of warm water. You don't need much — you're not doing dishes.
- Soak briefly. Drop the piece in and let it sit for two to three minutes. This loosens oils and surface grime without any scrubbing required.
- Gently scrub. Use a soft toothbrush to get into crevices, chain links, and settings. Use a gentle circular motion. Don't press hard.
- Rinse thoroughly. Hold the piece under warm running water. Make sure all the soap is gone — soap residue left in settings can cause dullness over time.
- Dry completely. Pat dry with a lint-free cloth, then let it air dry fully before storing. This step matters more than most people realize. Even a tiny bit of trapped moisture under a stone or in a chain link can accelerate tarnish.
How often should you do this? For pieces you wear regularly, once every two to four weeks keeps them looking clean. For everyday earrings or chains, a quick wipe with a soft cloth after each wear extends the time between full cleanings.
Method 2: Baking Soda Paste (For Stubborn Tarnish)
When dish soap isn't cutting through heavier tarnish — the kind that's visibly darkened the surface or settled into crevices — baking soda paste is your next step. Baking soda is a mild abrasive that polishes away the tarnish layer without being aggressive enough to scratch the silver itself, as long as you're gentle.
Important caveat: Do not use this method on pieces with soft gemstones (pearls, opals, turquoise, coral, or emeralds), antique silver with intentional oxidized darkening in the recesses, or silver-plated pieces. For those, stick to dish soap and water or a dedicated jewelry polishing cloth.
Steps
- Make a paste. Mix two parts baking soda with one part water until you get a thick paste. It should be spreadable but not runny.
- Apply with a soft cloth. Dab the paste onto your cloth, not directly onto the jewelry. Rub it gently onto the tarnished areas using small circular motions.
- Work into crevices carefully. For detailed pieces, use a soft toothbrush — but be gentle. More pressure doesn't mean more cleaning power; it just increases the risk of micro-scratches.
- Rinse thoroughly. Baking soda can leave a white residue in small crevices, so rinse under warm running water and check settings and chain links before drying.
- Dry completely. Same as before — pat dry, then air dry fully.
You'll usually see an immediate improvement after one round. If heavy tarnish remains, repeat once more. Don't over-do it — baking soda is mildly abrasive and repeated use on the same piece can gradually dull a high-polish finish over time.
Method 3: Aluminum Foil and Baking Soda Soak (The Chemistry Trick)
This one looks like a science experiment and works like one too. It uses an electrochemical reaction to reverse tarnish rather than scrubbing it away — which makes it ideal for heavily tarnished chain necklaces, bracelets, or intricate pieces where you can't easily reach every surface with a cloth.
Steps
- Line a bowl with aluminum foil, shiny side up.
- Place your silver jewelry on the foil so it's touching the foil directly.
- Add one tablespoon of baking soda and one tablespoon of salt to the bowl.
- Pour in enough boiling or very hot water to cover the jewelry completely.
- Let it sit for five to ten minutes. You'll likely see some fizzing and a slight sulfur smell — that's the reaction working.
- Remove with tongs or a spoon (it'll be hot), rinse thoroughly, and dry completely.
This method works because the aluminum acts as a sacrificial anode — the tarnish (silver sulfide) is chemically transferred from your jewelry to the foil. It's remarkably effective on chains and doesn't require any scrubbing at all.
Skip this method for: Jewelry with glued-in stones, pearls, antique pieces, or any piece with non-silver components that might react to heat or the salt solution.
Method 4: Commercial Silver Polish (For Deep Cleaning)
Commercial silver polishes like Wrights Silver Cream, Town Talk, or Goddard's Silver Polish are formulated to remove tarnish efficiently and often include ingredients that leave a protective coating to slow future tarnishing. They're a good choice for heavily tarnished pieces, flatware, or silver you haven't cleaned in a long time.
Follow the product instructions — most involve applying a small amount with a soft cloth, rubbing gently, and then buffing with a clean cloth. The key things to keep in mind:
- Less is more. You don't need to coat the piece — a small amount on a cloth goes a long way.
- Rinse after use unless the product specifically says not to — residue left on the piece can cause further tarnish.
- Don't use on gemstone pieces unless the label says it's safe. Most commercial polishes aren't formulated for stones and can cloud or damage settings.
- Don't use too frequently. Polishes remove a very thin layer of metal each time. For everyday pieces, once every few months is plenty.
A dedicated silver polishing cloth (impregnated with mild polish) is a gentler everyday alternative. These are inexpensive, reusable, and excellent for a quick shine-up between deeper cleanings.
What NOT to Use on Sterling Silver Jewelry
Half of knowing how to clean sterling silver correctly is knowing what to avoid. Some common "hacks" online cause real, sometimes irreversible damage.
| What to Avoid | Why It's Harmful | Safe Alternative |
|---|---|---|
| Bleach or chlorine | Reacts chemically with silver, causing permanent pitting and discoloration. Cannot be reversed. | Dish soap and warm water |
| Whitening toothpaste | Contains abrasives (silica, baking soda, calcium carbonate) that scratch the silver surface and can damage soft stones. | Plain baking soda paste |
| Ultrasonic cleaners (for gemstone pieces) | Vibrations can loosen stone settings, crack fragile stones (opals, emeralds, pearls), and damage antique patinas. | Dish soap with a soft brush |
| Paper towels or rough cloths | Can micro-scratch polished silver surfaces, leaving visible fine scratches over time. | Lint-free microfiber or dedicated silver polishing cloth |
| Acetone / nail polish remover | Can strip rhodium plating, damage glued settings, and react with some stone treatments. | Dish soap and water for surface residue |
| Lemon juice or vinegar alone | Acidic enough to etch silver with prolonged contact. Sometimes combined with baking soda online — the acid and base neutralize each other, making the combination pointless and potentially damaging. | Baking soda paste in water (no acid) |
| Hot water (boiling) on gemstone pieces | Thermal shock can crack stones or loosen adhesive settings. Fine for plain silver but risky with stones. | Warm (not hot) water |
According to the Gemological Institute of America (GIA), many gemstones require specific care considerations, and what's safe for bare metal often isn't safe for stones. When in doubt, go gentler — tarnish is easier to fix than a scratched stone or snapped prong.
Cleaning Sterling Silver Jewelry with Gemstones
Pieces that combine sterling silver settings with stones need a more cautious approach. Different stones have wildly different tolerances for heat, acids, and abrasion.
Safe for Most Methods
Diamonds, sapphires, rubies, and most garnets are durable enough to handle warm soapy water and a soft brush. They can also usually tolerate the foil-baking soda soak as long as the water isn't boiling.
Dish Soap Only
Pearls, opals, turquoise, coral, malachite, amber, and any dyed or treated stones should only be cleaned with warm water and a drop of dish soap on a soft cloth — no soaking, no scrubbing, no abrasives. These stones are porous, soft, or treated in ways that make them sensitive to chemicals and moisture.
Wipe Clean Only
Pieces with glued-in stones (common in fashion jewelry and some sterling silver pieces) should never be soaked at all — the adhesive softens in water over time, causing stones to fall out. A barely damp cloth over the silver, avoiding the stone entirely, is the safest approach.
Drying and Storage: The Part Most People Skip
Cleaning your silver is only half the equation. How you dry and store it determines how quickly it tarnishes again.
Drying
After rinsing, pat the piece dry with a soft lint-free cloth, then let it air dry completely — ideally for 20 to 30 minutes — before putting it away. Don't use heat (hair dryers, heaters) as this can warp delicate chains or stress settings. The goal is zero moisture before storage.
Storage
- Airtight storage is your best friend. Zip-lock bags with the air squeezed out dramatically slow tarnish by limiting exposure to air and humidity. A dedicated anti-tarnish zip bag (available cheaply online) works even better.
- Store pieces separately. Silver can scratch against other jewelry. Individual pouches or compartmentalized jewelry boxes prevent this.
- Anti-tarnish strips placed inside your jewelry box or storage drawer absorb sulfur compounds from the air before they can reach your silver. Replace them every three to six months.
- Silica gel packets (the kind that come with shoes and bags) reduce humidity inside a jewelry box. Keep a few in there and swap them out occasionally.
- Avoid storing silver in the bathroom. Humidity from showers accelerates tarnishing significantly. Even leaving silver on a bathroom counter speeds up the process.
Wear It
This one surprises people: sterling silver jewelry that's worn regularly often tarnishes more slowly than pieces sitting in a drawer. The friction from wearing gently buffs the surface, and the natural oils in your skin can create a very mild protective layer. Obviously this doesn't apply if you're wearing it into chlorinated pools or putting it on over fresh perfume — but regular, careful wear is actually good for sterling silver.
How Often Should You Clean Sterling Silver?
There's no single right answer — it depends on how often you wear it, your environment, and your skin chemistry. As a general guide:
- Everyday earrings or chains: Quick wipe with a soft cloth after each wear; a full soap-and-water clean every two to four weeks.
- Occasional wear pieces: Clean before wearing if they've been stored for a while; check for tarnish every one to two months.
- Display or heirloom pieces: Clean gently two to three times a year; focus on proper storage to minimize tarnish buildup.
If your silver tarnishes unusually fast, check your environment (high humidity areas tarnish faster), your skin (higher acidity in sweat accelerates tarnish), and your storage. Switching to airtight storage with anti-tarnish strips often dramatically extends the time between cleanings.
Frequently Asked Questions
Can I use toothpaste to clean sterling silver jewelry?
Plain white toothpaste in small amounts has been used as a silver cleaner, but it's not recommended. Most modern toothpastes — including "gentle" ones — contain abrasive particles designed to scrub tooth enamel. On silver, those same particles create fine scratches that dull the surface finish over time. Whitening toothpastes are worse, with more aggressive abrasives. Stick to baking soda paste if you want an abrasive clean — it's gentler and better controlled.
How do I clean a sterling silver chain necklace without tangling it?
For chain necklaces, the aluminum foil and baking soda soak works especially well because you don't need to scrub at all — the electrochemical reaction does the work. Lay the chain flat in the lined bowl rather than bunching it up. When removing it, lift it straight out and lay it flat on a towel to dry. If you need to use a toothbrush, work along the length of the chain rather than scrubbing across it, which reduces the chance of kinking or tangling.
Why does my sterling silver turn my skin green?
This happens when the copper in the sterling silver alloy reacts with the acids in your sweat to form copper chloride — a greenish compound that transfers to your skin. It's harmless and doesn't mean the jewelry is fake or low quality. It happens more often in warm, humid conditions or if you have naturally acidic sweat. Keeping the piece clean and dry reduces the reaction. Some people also apply a thin layer of clear nail polish to the inside of rings where they contact skin directly, which creates a barrier without affecting the appearance.
Is it safe to clean sterling silver jewelry with ultrasonic cleaners?
For plain sterling silver with no stones or minimal settings, ultrasonic cleaners are generally safe. The problem comes with gemstone pieces — the vibrations can loosen prongs, crack brittle or included stones (especially emeralds, opals, and tanzanite), and cause irreversible damage to pearls or coral. If your piece has any stones set into it, skip the ultrasonic cleaner and use warm soapy water with a soft brush instead. When in doubt, ask your jeweler whether a specific piece is ultrasonic-safe.
How do I remove heavy black tarnish from sterling silver?
For severely tarnished pieces, the aluminum foil electrochemical method is the most effective starting point because it works without abrasion. After that soak, if some tarnish remains, follow up with a baking soda paste and gentle scrubbing. For extremely neglected pieces, a commercial silver dip cleaner can dissolve heavy tarnish quickly — but use it briefly (no more than the time specified on the label), rinse thoroughly, and dry completely. Don't leave silver in a dip cleaner for extended periods.
Can I wear sterling silver jewelry in the shower?
It won't damage the silver immediately, but regular showering with sterling silver jewelry accelerates tarnishing noticeably. Soap, shampoo, and conditioner can leave a film in settings and chain links that dulls the piece. Chlorine in tap water reacts with silver over time. The bigger issue is that showering with jewelry is a frequent cause of lost pieces when clasps open or chains snag. The habit of taking jewelry off before showering extends both the look and life of sterling silver significantly.
What's the difference between silver-plated and sterling silver jewelry, and does cleaning differ?
Sterling silver is a solid alloy — 92.5% silver throughout. Silver-plated jewelry has a thin layer of silver deposited over a base metal (often brass or copper). For cleaning, sterling silver can handle mild abrasives like baking soda paste because there's no plating to wear through. Silver-plated pieces should be cleaned only with the gentlest methods — dish soap and water with a soft cloth — because abrasives or aggressive polishes can strip the plating and expose the base metal underneath, which can't be restored at home.
How do I store sterling silver to prevent tarnishing?
The key is limiting exposure to air, moisture, and sulfur compounds. Store each piece in its own airtight zip bag with the air squeezed out, or in an anti-tarnish pouch. Keep a few silica gel packets and anti-tarnish strips in your jewelry box and replace them every three to six months. Avoid storing sterling silver in the bathroom (too humid), near rubber bands or wool (both emit sulfur), or loose in a box where pieces rub together. Proper storage can extend the time between cleanings from weeks to months.
Can I clean sterling silver with hydrogen peroxide?
Hydrogen peroxide is safe for cleaning wounds, but it's not ideal for sterling silver jewelry. It can react with the copper in the alloy and may affect certain stone treatments or finishes. It's also not particularly effective at removing tarnish — silver sulfide doesn't dissolve easily in hydrogen peroxide. If you want a chemical cleaning method, stick with commercial silver dip cleaners designed specifically for the task, or the baking soda and aluminum foil method, both of which are more effective and better understood.
How do I clean sterling silver earrings specifically?
The backs of earrings — especially earring posts and butterfly backs — tend to accumulate skin oils, makeup, and dead skin cells that can harbor bacteria over time. For earring posts, a cotton swab dipped in warm soapy water works well to clean the post and the front face without soaking the entire piece. Pay attention to the butterfly back — squeeze it gently under warm running water while rubbing it with your fingers to clear any buildup. Let earrings air dry fully before putting them back in, and clean them more frequently than other jewelry since they're close to the skin all day.
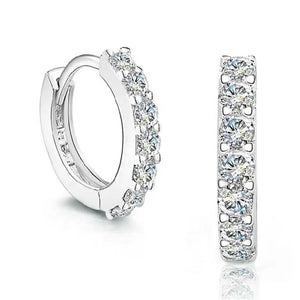
If you're prone to skin reactions from jewelry, it's worth considering that the issue sometimes isn't tarnish but rather nickel content in your pieces. Genuinely hypoallergenic earrings made from solid 925 sterling silver or titanium eliminate that variable entirely. Our hypoallergenic earring collection is made from solid 925 sterling silver — nickel-free, skin-safe, and easy to keep clean using all the methods above. Whether you're looking for everyday studs, hoops, or something more delicate, it's a good place to start if you've had trouble finding earrings that don't irritate your ears.
You Might Also Like


The piece they're describing → Heart Initial Necklace for Women — 18K Gold Plated, Personalized Letter + Heart Pendant
Personalize Yours

