


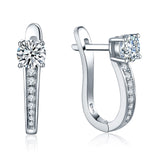
Most jewelry-cleaning advice treats every piece the same way — a soft cloth, maybe a little soap and water, done. Earrings don't quite fit that pattern. They're the only common jewelry type that sits directly against skin and, for pierced styles, actually passes through it, which means the post and backing accumulate a layer of buildup that a necklace or bracelet never has to deal with. If you searched how to clean earrings because a pair started to smell, look dull, or irritate your ears, the post and backing — not the decorative front — are almost always the real problem. This guide walks through why earrings need more frequent attention than other jewelry, the safe way to clean both halves of an earring, how often to actually do it, and what changes if you're dealing with a new piercing instead of healed ears.

Why Earrings Get Dirtier Than Other Jewelry
A necklace rests on top of clothing or skin and can be taken off and set down without much thought. A ring circles a finger that gets washed constantly throughout the day. Earrings are different in three ways that add up to faster buildup:
- Direct, prolonged skin contact. The post and backing sit against the earlobe or cartilage for hours at a stretch, sometimes around the clock if you sleep in them, collecting natural skin oil (sebum) the entire time.
- Hair contact. Earrings brush against hair constantly, which means hairspray, dry shampoo, styling product, and natural hair oils transfer onto the earring far more than they would onto a necklace or ring.
- Product layering from the face and neck. Perfume, lotion, sunscreen, and makeup applied near the ears settle onto earrings throughout the day, and that residue builds in the tight space between the backing and the earlobe where it's hardest to see or wipe away casually.
None of that buildup is visible the way tarnish or a dull finish is. It hides in the small gap between the backing and the ear, which is exactly why earrings can start to smell or cause irritation well before they look dirty. It's also why earring hygiene carries a higher stake than most other jewelry categories: a dirty ring might look less shiny, but a dirty earring post sitting in a piercing channel can contribute to redness, soreness, or a buildup-related bump, especially for people with sensitive skin or newer piercings.
The Post and Backing Need Different Care Than the Decorative Front
Every earring is really two cleaning jobs in one piece: the decorative front (the part everyone sees — the stud, hoop, or charm) and the post-and-backing assembly (the part that actually touches skin and, for pierced styles, sits inside the piercing channel). Treating them the same way misses the point, since the front mostly needs to look good and the post mostly needs to be hygienic.
| Part of the earring | Main concern | Recommended method | How often |
|---|---|---|---|
| Decorative front (stud, hoop, charm) | Appearance — tarnish, dullness, visible smudging | Soft cloth wipe after wearing; occasional warm soapy water for buildup | After heavy wear or when visibly dull |
| Post (the pin that passes through the piercing) | Hygiene — skin oil, product residue, bacteria in the piercing channel | Rubbing alcohol on a cotton swab (healed ears only) or mild soap and water | Weekly, or more often for daily wear/sleep-in earrings |
| Backing (butterfly clutch, screw-back, or push-back) | Hygiene — direct, hidden skin contact; hardest area to see buildup on | Remove from post, soak in warm soapy water, scrub gently with a soft toothbrush, rinse and dry fully | Weekly |
The backing is worth calling out specifically because it's the piece people forget to clean most often. It's small, it's usually plain metal with no gemstone or finish to protect, and it can typically be removed and washed separately from the post without any risk — which makes it the easiest part of the earring to actually get properly clean, if you remember to do it.

Step-by-Step: How to Clean Earrings at Home
This method works for the vast majority of healed-ear situations across sterling silver, gold-plated, gold-filled, and stainless steel earrings. If you have a new or unhealed piercing, skip to the piercing-specific section below instead — alcohol and soap are too harsh for healing skin.
- Remove the backing. Push-backs, butterfly clutches, and screw-backs almost always come off the post. Set the backing aside to clean separately.
- Wipe the front. Use a soft, lint-free cloth on the decorative front of the earring to remove everyday smudging and light oil.
- Disinfect the post. Dip a cotton swab in rubbing alcohol and gently wipe the length of the post, including where it meets the front piece. Alcohol evaporates quickly and doesn't leave residue, which makes it effective for the part of the earring that actually sits inside the piercing.
- Soak the backing. Drop backings into a small bowl of warm water with a drop of mild, unscented dish soap. Let them sit for a few minutes, then gently scrub with a soft toothbrush to loosen any trapped residue.
- Rinse everything thoroughly. Any leftover soap film can irritate skin just as much as the buildup you're trying to remove, so rinse the backing fully under running water.
- Dry completely before reassembling. Pat both pieces dry with a clean cloth and let them air-dry the rest of the way. Putting a damp earring back into a piercing traps moisture against skin, which is exactly the environment that encourages irritation.
For gemstone-set or delicate plated pieces, skip the alcohol on the front and stick to a soft cloth — reserve the alcohol step for the post itself, which is bare metal on nearly every earring regardless of what's set into the front.
How Often You Should Actually Clean Earrings
There's no single answer, since it depends on how often you wear a given pair and how close it sits to skin and hair. As a practical baseline:
- Earrings worn daily or slept in: wipe the front after each wear and disinfect the post and backing weekly. Constant wear means constant buildup, and sleeping in earrings adds pillow contact and overnight moisture to the mix.
- Earrings worn a few times a week: a weekly post-and-backing clean is still worthwhile, but the front usually only needs attention when it looks visibly dull.
- Earrings worn occasionally: clean before and after wearing, since they've likely been sitting in a jewelry box collecting dust or tarnish between uses rather than skin oil.
- Earrings that smell, feel sticky, or cause any itching: clean immediately regardless of the schedule above — that's buildup or irritation signaling it's overdue, not a sign to wait for the next scheduled cleaning.
Compare that to a necklace or bracelet, which most people can reasonably clean every few weeks to monthly without issue. The gap exists because those pieces don't sit in a piercing channel or spend all day against an area that's also collecting hair and facial product.
Hygiene Rules for Daily Wear and Sleeping in Earrings
A lot of people wear one or two pairs of earrings essentially full-time — a small stud in each lobe, a stack of hoops and huggies, or a sleep-in pair specifically chosen for that purpose. That habit is fine for healed ears, but it comes with a few non-negotiable hygiene rules:
- Choose flat-back or push-back styles for sleeping. A flat backing sits closer to the ear and won't dig in or catch on a pillow the way a butterfly clutch can, and pieces marketed as sleep-in earrings are usually built lighter and lower-profile for exactly this reason.
- Still remove and clean them on a schedule. "Sleep-in" describes the earring's design, not a pass on cleaning. Sleep-in earrings still need the same weekly post-and-backing routine — arguably more, since they're getting extra hours of skin and pillow contact other earrings don't.
- Rotate if you notice any redness or tenderness. Constant contact from the same earring in the same spot can occasionally irritate skin even when it's clean. If a lobe looks red or feels sore, give it a break in a different pair or no earring at all for a day.
- Wash hands before touching earrings or ears. This applies to putting earrings in, taking them out, and any adjustment in between — hands carry more bacteria than most people assume, and every touch is a chance to transfer it directly to the piercing.
- Keep hair products away from fresh earrings when possible. Letting hairspray or dry shampoo settle before earrings go back in reduces how much product ends up trapped against the post.
New Piercings vs. Healed Ears: Different Cleaning Rules Apply
Everything above assumes a fully healed piercing. A new piercing is a different situation entirely, and using the wrong cleaning method on healing skin can slow healing or cause irritation rather than prevent it. According to the American Academy of Dermatology's guidance on caring for pierced ears, new piercings should be left in place (not removed and reinserted repeatedly) for at least six weeks to avoid the hole closing, hands should be washed before any contact with the area, and the piercing should be cleaned daily with a gentle, fragrance-free cleanser — specifically avoiding hydrogen peroxide and rubbing alcohol, both of which can dry out and irritate healing skin rather than help it.
That's the opposite of the alcohol-on-a-cotton-swab method recommended above for healed ears, which is exactly why the distinction matters:
- New/unhealed piercing: gentle, fragrance-free cleanser only. No alcohol, no hydrogen peroxide, no soaking, no removing the starter earring before the healing window is up.
- Healed piercing (typically 6+ weeks, longer for cartilage): the alcohol-and-soap routine in this guide applies, and earrings can be freely removed, cleaned, and swapped.
If a new piercing shows soreness, redness, swelling, or yellowish discharge, that's a signal to see a dermatologist rather than clean more aggressively at home — over-cleaning an irritated piercing tends to make things worse, not better.
Material-Specific Notes for Common Earring Metals
The post-and-backing routine above works across virtually every metal earrings come in, but a few materials have their own extra considerations worth knowing:
- Sterling silver tarnishes from sulfur compounds in the air, so the decorative front may need an occasional polish beyond the basic wipe-down — see our full guide to cleaning tarnished jewelry for the complete anti-tarnish routine.
- 18K gold-plated earrings can wear thin with harsh scrubbing, so keep alcohol to the bare post and use only a soft cloth on the plated front.
- Titanium is essentially maintenance-free and one of the most hypoallergenic options for fresh piercings — our dedicated guide on how to clean titanium jewelry covers why it barely needs cleaning at all, and our piece on whether titanium is truly hypoallergenic goes deeper on the allergy side.
- Moissanite or gemstone-set studs need the stone-safe cleaning approach rather than a full soak — see how to clean moissanite jewelry for the specifics.
- Stainless steel and surgical steel, common in flat-back and starter earrings, tolerate the alcohol-and-soap routine well and are among the most forgiving metals for the post specifically.
If you're building out a whole ear with a mix of metals and styles, our guide to the best materials for earrings and ear stacking guide cover how to choose pieces that pair well and wear comfortably together, which also makes cleaning routines easier to keep consistent across a full stack.
What to Avoid When Cleaning Earrings
- Sharing earrings, even briefly. Earring posts and backings that have touched someone else's skin carry a real risk of transferring bacteria to a piercing, cleaning or not.
- Reusing a cotton swab across multiple earrings. Use a fresh swab per earring, or at minimum per ear, to avoid transferring buildup or bacteria from one piercing to another.
- Alcohol or hydrogen peroxide on new piercings. As covered above, this dries and irritates healing skin rather than helping it — stick to a gentle cleanser during the healing window.
- Abrasive scrubbing on plated or gemstone-set fronts. Save any scrubbing for bare backings and posts; a soft cloth is enough for decorative fronts.
- Storing damp earrings. Putting earrings away wet — whether from cleaning or from a shower — traps moisture against the metal and can accelerate tarnish on silver or, on the post side, create a less hygienic environment for the next wear.
Frequently Asked Questions
How do I clean the post and backing of my earrings?
Wipe the post with a cotton swab dipped in rubbing alcohol, and remove the backing to soak separately in warm water with a drop of mild dish soap. Rinse and dry both pieces fully before putting the earring back in.
What is the best daily hygiene routine for earrings?
Wipe the front with a soft cloth after wearing, wash your hands before touching your ears or earrings, and disinfect the post and backing at least once a week, more often if you wear the same pair daily or sleep in them.
Why do my earrings smell or irritate my skin?
Smell and irritation almost always come from buildup — skin oil, lotion, hairspray, and product residue trapped between the backing and the ear. Cleaning the post and backing thoroughly, then drying them completely before wearing again, usually resolves both issues.
How often should I clean earrings I wear every day?
At least once a week for the post and backing, since daily wear means constant exposure to skin oil and hair product. Earrings worn only occasionally can be cleaned before and after each wear instead of on a fixed schedule.
Should I clean earrings differently for a new piercing versus healed ears?
Yes. New piercings need a gentle, fragrance-free cleanser only — no alcohol or hydrogen peroxide, per dermatologist guidance — while healed ears can safely handle the alcohol-and-soap routine and more frequent removal and cleaning.
Can I use rubbing alcohol on all earring materials?
Rubbing alcohol is safe on the bare metal post of most healed-ear earrings, including sterling silver, gold-plated, titanium, and stainless steel. Keep it off gemstones, pearls, and any decorative front with adhesive-set stones, and never use it on a new or healing piercing.
How do I remove stubborn buildup from earring backs?
Soak the backing in warm water with a drop of mild dish soap for a few minutes, then gently scrub with a soft toothbrush to loosen trapped residue. Rinse thoroughly and dry completely before reattaching it to the post.
Should I avoid soaking gemstone or pearl earrings?
Yes — soak only the metal backing, not gemstone or pearl-set fronts. Pearls especially can be damaged by soaking and chemical cleaners, so wipe the front with a soft dry or barely-damp cloth instead.
Is it necessary to clean gold-plated earrings differently than fine jewelry?
Mostly in degree, not method — use a soft cloth rather than scrubbing on the plated front to avoid wearing down the plating layer, but the post and backing can still be cleaned with the same alcohol-and-soap routine used for solid metal earrings.
What household items can I use to clean earrings safely?
Rubbing alcohol, mild unscented dish soap, warm water, a soft lint-free cloth, and a soft-bristled toothbrush (a baby toothbrush works well for small pieces) cover nearly every situation. Skip toothpaste, baking soda, and other abrasive DIY pastes, which can scratch plated or delicate finishes.
How can I prevent earrings from getting dirty between cleanings?
Let lotion, sunscreen, and hairspray dry before putting earrings in, wash hands before handling earrings, and remove earrings before swimming or intense workouts when possible. None of this replaces regular cleaning, but it slows how fast buildup accumulates.
Final Thoughts
Earrings need more frequent, more targeted cleaning than the rest of your jewelry box because of where and how they sit — against skin and hair for hours at a time, with a post and backing that trap buildup in a spot you can't easily see. The good news is the actual method is simple: a soft cloth for the decorative front, rubbing alcohol on the post, and a warm soapy soak for the backing, done weekly for anything worn regularly. The one real exception is a new piercing, where gentler, dermatologist-approved care matters more than a thorough scrub. Get the routine down once and it becomes a two-minute habit rather than a chore.
Building a low-maintenance everyday stack? Our flat-back studs are designed for healed, sleep-in wear.
Shop Flat Back Stud Earrings — Hypoallergenic Sterling SilverLooking for more everyday, easy-care styles? Browse our full hypoallergenic earrings collection — every piece is genuine 925 sterling silver or 18K gold plating, nickel-free, and designed for sensitive and healed-piercing ears.
Shop This Guide
- Flat Back Stud Earrings — Hypoallergenic Sterling Silver
- Shop All Hypoallergenic Earrings
- How to Clean Tarnished Jewelry
- Best Materials for Earrings
- Ear Stacking Guide
Written by the AJLuxe Team — specialists in nickel-free 925 sterling silver and 18K gold-plated hypoallergenic jewelry. Sources: American Academy of Dermatology — Caring for Pierced Ears. Last updated: July 2026.
Toutes les marques, noms de marque et noms de produits tiers sont la propriété de leurs détenteurs respectifs. AJLuxe n’est affilié à aucune marque tierce citée dans cet article, ni approuvé ou sponsorisé par celle-ci. Les noms de marque sont utilisés uniquement à des fins de comparaison factuelle, et les descriptions de matériaux reflètent les spécifications produit publiées par chaque marque au moment de la rédaction.
You Might Also Like
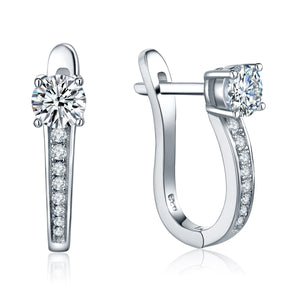
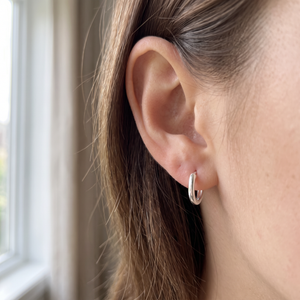
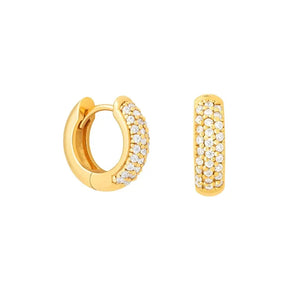
The piece they're describing → Boucles d'oreilles créoles en moissanite pour femme — Argent sterling 925, taille brillant, hypoallergéniques
Personalize Yours


